sábado, 30 de noviembre de 2013

Lemon and oregano lamb kebabs recipe

Photo: Lemon and oregano lamb kebabs recipe

The Arabic Food Recipes kitchen (The Home of Delicious Arabic Food Recipes) invites you to try Lemon and oregano lamb kebabs  Recipe. Enjoy the Arabic Cuisine and  learn how to make Lemon and oregano lamb kebabs.

These tasty lamb skewers taste great served with Lebanese bread and a squeeze of lemon.

Preparation Time 20 minutes
Cooking Time 20 minutes

Ingredients (serves 4)

80ml (1/3 cup) fresh lemon juice
2 tbs extra virgin olive oil
1 tbs dried oregano
2 garlic cloves, crushed
1kg lamb leg steaks, cut into 2.5cm pieces
6 ripe tomatoes, coarsely chopped
1 small red onion, cut into thin wedges
1 1/4 cups fresh continental parsley leaves
100g Greek feta, crumbled
Lemon wedges, to serve
Lebanese bread, to serve

Method

Combine the lemon juice, oil, oregano and garlic in a shallow glass or ceramic dish. Thread lamb onto skewers. Add to marinade and turn to coat. Cover and place in fridge for 4 hours to marinate.

Preheat a chargrill on medium-high. Add half the lamb and cook for 4-5 minutes each side for medium or until cooked to your liking. Transfer to a plate and cover with foil to keep warm. Repeat with remaining lamb.

Combine the tomato, onion, parsley and feta in a bowl. Divide among serving plates and top with lamb. Serve with lemon wedges and bread.

Notes

Note: Allow 4 hours marinating time.

Source
Good Taste - October 2006, Page 98
Recipe by Michelle Southan

More Arabic Food Recipes: 

Build-Your-Own Shish Kabobs
Eggplant & couscous salad with yoghurt dressing
Chickpea Fattoush
Lentil & tomato salad with garlic lebanese bread
Lebanese Fattoush Salad with Grilled Chicken
Mediterranean-style bean salad

Save and share Lemon and oregano lamb kebabs recipe

 Want to share this recipe with your family and friends? Click the button below to send them an email or save this to your favorite social network.
jueves, 28 de noviembre de 2013

Planning for the Hunger Challenge

Planning for the Hunger Challenge
Shopping on a tight budget isn't impossible, but it does take work. Yesterday I started planning for the Hunger Challenge, a campaign to help raise awareness about hunger in our community. For one week during Hunger Action Month participants live on a very limited food budget, comparable to what food stamp recipients live on. In 2008 just seven of us participated in the Hunger Challenge and the budget was $3 a day, this year there will be over 50 250 people participating and the budget is $4.72 per day.

Tomorrow I will be shopping with CBS reporter and Hunger Challenge participant Juliette Goodrich at Foods Co. Yesterday I read the Food Co weekly flyer and planned my menu based on sale items and what I know I can afford.

Here is what I plan on cooking and eating, for new dishes I will post the recipes throughout the week:

Dinners:
Panela and Vegetable Kabobs - a new recipe I will be creating for the challenge. Panela is a cheese similar to haloumi but much less expensive.

Chicken and Bacon Quesadillas - another new recipe that I am creating for the challenge.

Chicken and Rice Soup - past participant Vanessa Barrington made this recipe a few years ago l based on a recipe by Andrea Nguyen

Moroccan Chicken & Lentils - I will be modifying a Bon Appetit recipe I found on Epicurious

Pasta Fagioli - truly cucina povera, something I made the first year of the Hunger Challenge, but this time I think I will add some spinach

Chili - I will make this using a variety of beans, corn, onions and peppers

Red beans and rice

For breakfast, I will eat oatmeal or eggs

For lunch I will eat leftovers or quesadillas. In past years, I have eaten peanut butter and jelly sandwiches, but I just don't want to do that again.

Of course my plans may change depending upon what I find at the store and how much I can buy...

Hunger Challenge 2011

martes, 3 de septiembre de 2013

Top 5 Reasons Why I Love Thanksgiving

Thanksgiving table

Thanksgiving is hand's down, my favorite holiday of the year. I think I even like it better than my birthday, which is really saying something. So here's why:

1. There is nothing you have to do on Thanksgiving, other than share a meal. There are no religious ceremonies or gift giving. You can say a prayer before eating or watch a parade or play football if you want, but you can also take a nap! It's all good.

2. It's inclusive. Anyone who is in America (or outside of America for that matter) can celebrate this holiday if they want to. It's not about race or religion or nationality, in fact, it's about welcoming and helping those who are newcomers and celebrating the harvest.

3. It's about comfort food. I hear a lot of people complaining about traditional Thanksgiving food, they say turkey is boring, pumpkin pie is heavy and stodgy. To them I say, it's comfort food, not fine dining. Get over it. Besides, this holiday is about sharing a meal with friends and family, what you eat is secondary. Go out for Chinese food if you prefer, that is, if you can find a Chinese restaurant that's open.

4. It's two blessed days off. For most people anyway. That is reason enough to be thankful.

5. Leftovers!

Happy Thanksgiving!

A few favorite past Thanksgiving posts from the archives:

How Thanksgiving became a national holiday

Brussels sprouts with brown butter and hazelnuts recipe

Cranberry coffeecake recipe

Curried Butternut Squash Soup recipe

Pilgrim onion marmalade recipe

Turkey drumsticks braised in cranberry sauce recipe

lunes, 27 de mayo de 2013

THENKUZHAL | MURUKKU - STEP BY STEP RECIPE


THENKUZHAL

Mostly we all make thenkuzhal for diwali or some special occasions. I love this murukku since my childhood days.I used to do all the pre preparatory works like buying rice and dal , grinding it in flour mill etc..I sit with my mom & paati when they make this for diwali especially for the last batch of murukku .. She makes half cooked murukku( we call it "arai vekkaadu" in tamil) . I love this murukku more than the crispy ones. I eat it hot immediately after taking out from the oil.Even today , my MIL made this specially for me..How sweet !!In love .I saw so many thenkuzhal recipes in web with different proportions of rice and urad dal . I want to share my version.I tried to take step by step pics for beginners. I really admire our fellow bloggers who blog recipes with step by step pics for each and every post. They have so much of patience and skill to do this. I really don't have both Winking smile.For sweets and savouries step by step presentation is most essential i feel. Hope this post helps beginners. Feel free to leave ur comments about my presentation.I will improve in my further posts. Now coming to my version..

INGREDIENTS

  • Raw rice / Maavu arisi – 1 kg or  5 cups
  • Round white urad dal – 3/4 cup
  • Fried gram dal / pottukadalai – 1 handful
  • Butter – 4 tbsp or 100 gms
  • Asafetida / hing – 1/2 tsp
  • Jeera / cumin seeds or Black sesame seeds – 2 tbsp
  • Salt & water – As needed.
  • Cooking oil – for deep frying..

"""PLEASE HAVE A LOOK AT THE "POINTS TO REMEMBER" BEFORE STARTING.."""

METHOD

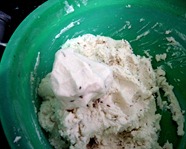
  1. Heat a kadai and dry roast urad dal slightly without changing its colour. Roast till nice aroma comes from urad dal. Switch off the flame and add the fried gram dal.
  2. Now mix the rice, roasted urad dal and fried gram dal.
  3. Grind in flour mill or powder it in mixie. If u use mixie to grind the mixture, please don't forget to sieve the flour. Flour should be very fine in texture.

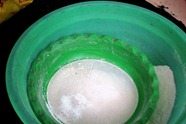
sieve

  1. Add salt , melted butter, hing , jeera or sesame seeds and water to make a non sticky dough.

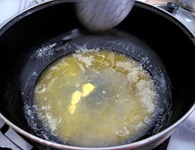
melted buttermurukku dough

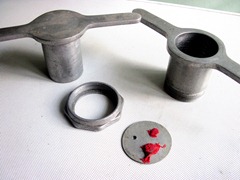
Take the murukku press and mould with one whole.

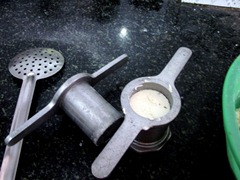
achudough in achu

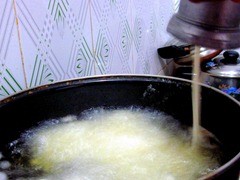
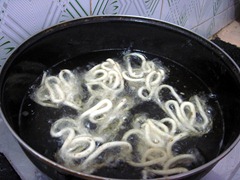
Fill the dough and set aside.Heat the oil in a broad kadai and and press the murukku in circular motion directly in oil or press the murukku in a polythene sheet or in the back of ladle separately and then drop in hot oil. This way u get a nice shape. After u press the murukku , please stand a few feet away from the kadai.Sometimes , very rarely murukku may burst like seedai . If it doesn't burst, then proceed.

pressing murukku

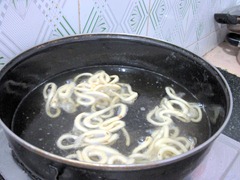
Cook for sometime.Flip and cook for some more time till the hiss sound and bubbles ceases .

Do it in medium flame.Adjust the flame whenever needed.

cookingsound ceased

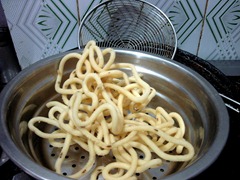
Remove and drain in a paper towel..Store in an air tight container after it cools down.

murukku in colander

Don't forget to try the half cooked murukku in the last batch.

For this after u drop the murukku in oil , just flip immediately and remove in 10 secs.. Eat it hot !!

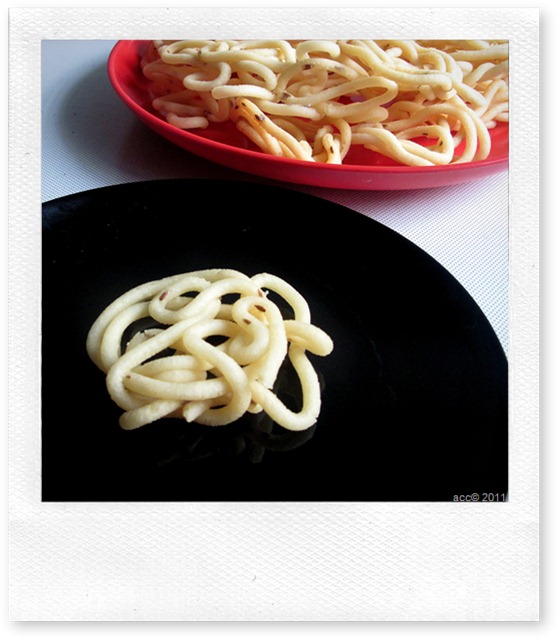
White colored , crispy thenkuzhal is ready to enjoy !!

COLLAGE

Points to remember

  • When u make murukku in large quantities , make the dough in batches to avoid the dough from drying.Also cover the dough with a damp cloth or a lid while cooking murukku. This helps in getting white colored murukku for all the batches. Otherwise color may vary for the last batches.
  • We have added fried gram dal and butter to get the crispness & white color . But usually fried gram dal is not added in thenkuzhal.Its purely optional.
  • Adding too much of butter makes the murukku look oily and becomes soggy very soon.Shelf life gets reduced.
  • Adding more urad dal flour or too much of roasting the urad dal results in dark colored murukku.So make sure u roast the urad dal without changing the color..
  • If u use store bought rice flour and urad dal flour , the ratio would be 6:1.No need to roast the urad dal flour if it is ready made.
  • The murukku flour should be very fine in texture otherwise it may burst while cooking. So i always sieve the flour for safer side Winking smile
  • Use enough oil for deep frying. Add more oil after few batches if necessary.
  • Drop or press the murukku only when the oil becomes hot. U can find this by dropping a pinch of flour. It raises up quickly.This is the correct heating point. Do not let the oil fume. Always keep the flame in medium for even cooking.
  • Instead of pressing in oil directly , u can try pressing it in the back of ladle greased with oil or greased polythene sheets. This way u'll get nice shape.. 
  • After cooking when u break the murukku , u can c a hole in the middle of the murukku like  funnel. This denotes the murukku is perfect !!

hole in murukku

Can u see the hole  Winking smile. Catch u in my next post. Bye. Have a gr8 weekend Smile


jueves, 23 de mayo de 2013

BEETROOT PORIYAL

I learnt this from my mom.Usually my mom makes this as an accompaniment for keerai kuzhambu.Its my favorite..Last week i made for mor kuzhambu . It was a flavorful and excellent combo.

Beetroot poriyal

INGREDIENTS :

  • Beetroot - 2 nos (big)
  • Moong dal - 2 tbsp
  • Salt & water - As needed
  • Sambhar powder  or Red chilly powder- 1.5tsp

To grind :

  • Grated coconut - 3 tbsp
  • Small onion - 2 nos
  • Jeera - 1/4 tsp

To temper :

  • Oil -  1 tbsp
  • Mustard seeds - 1/2 tsp
  • Urad dal - 1/2 tsp
  • Big onion - 1 no (finely chopped)
  • Curry leaves - Few

METHOD :

  • Chop the beetroot into small pieces and pressure cook along with moong dal , sambhar powder , salt & water.
  • Grind all the ingredients given under 'to grind 'into a smooth paste adding little water.
  • Now temper the items mentioned above and add the cooked beetroot mixture.
  • Then add the ground coconut paste and saute well till the  raw smell emanates.

Enjoy with sambhar/ mor kuzhambu / Keerai kuzhambu with a papad .

KITCHEN CLINIC :

BEETROOT :
Beetroot contains sodium, potassium, phosphorus, calcium, iodine, iron, copper, Vitamins B1, B2, B3, B6 and C. Each capsule provides approximately 1-2mg of elemental iron.

Benefits and Features of Beetroot

  • Beetroot provides a good source of anthocyanadins, a natural antioxidant that contributes to its deep red color
  • Extract is a natural source of vitamins and minerals
  • Beetroot is used traditionally as a blood building food
  • Beetroot may aid the natural process of elimination and support detoxification processes
  • Beetroot has liver, spleen, gall bladder and kidney cleansing properties
  • Beetroot is particularly rich in Vitamin C, calcium, phosphorus and iron
  • Each capsule provides approximately 1-2mg of elemental iron
  • The iron contained in beetroot is organic and non-irritating and will not cause constipation
    Beetroot is useful in acidosis due to it being rich in alkaline elements
  • Vacuum packed to enhance stability and shelf life
  • Suitable for vegetarians and vegans
Beetroot for Cholesterol Reduction

Beet fiber has been shown to have cholesterol lowering capabilities. In a study on rats with induced high blood cholesterol, a red beet fiber diet caused a reduction of serum cholesterol and triglyceride levels (by 30 and 40%, respectively) and a significant increase in HDL cholesterol (good cholesterol). This diet induced also a significant decrease (almost by 30%) of cholesterol content in the aorta.

Beetroot for Blood Pressure

Beetroot juice has been shown to lower blood pressure in subjects with normal blood pressure. In healthy volunteers, approximately 3 hours after ingestion of 500 ml of beetroot juice, blood pressure was substantially reduced, an effect that correlated with peak increases in plasma nitrite concentration, nitrite being the blood pressure reducing ingredient.

Beetroot and nitrate capsules are equally effective in lowering blood pressure indicating that it is the nitrate content of beetroot juice that underlies its potential to reduce blood pressure. It has also been found that only a small amount of juice is needed – just 250ml – to have this effect.

Beetroot for Cardiovascular Disease Prevention

Betaine, a nutrient found in beets and some other foods lowers plasma homocysteine, a possible risk factor for cardiovascular disease. Betaine supplements are manufactured as a byproduct of sugar beet processing. Betaine "supplementation" has however been found to increase blood LDL cholesterol and triglyceride concentrations in healthy humans, which may undo the potential benefits for cardiovascular health of betaine supplementation through homocysteine lowering.

Beetroot for Healthy Liver Function

Beetroot contains the bioactive agent betaine, which supports healthy liver function. When the liver is functioning properly, fats are broken down efficiently, aiding weight loss, and preventing fatigue and nausea.

Glycemic Index of Beetroot

In a study to determine the estimated Glycemic Index of various foods, it was concluded that beetroot has a medium GI of 64.

Adverse Reactions from Beetroot

Beetroot and especially beet greens contain high levels of oxalate, and should be avoided by individuals with kidney stones containing oxalate

Beetroot contains nitrates and when they are cooked and left standing at room temperature, microorganisms that convert nitrates to nitrites begin to multiply, and the amount of nitrites in the beetroot rises. The nitrites combine with amines in the stomach to form nitrosamines, some of which are known carcinogens.


domingo, 19 de mayo de 2013

The Frugal Cook is away

No credit crunch drinking recs this week or next I'm afraid as I'm away on a work trip to Australia. (Yes, jammy, I know) Normal service will be resumed after December 11th.

Braised chicory with Roquefort


Having spent the last 10 days in France it's struck me again what a mystery it is that you can't order more vegetable-based dishes in French restaurants. It's not that they don't have the produce. Down in the Languedoc they have gorgeous leeks right now and great bagfuls of chicory which is something you rarely find in the UK - or not at a reasonable price. Yet the only greenery most restaurants seem to offer - and have done for the past umpteen years - is salade de chèvre chaud (grilled goats' cheese salad).

Anyway I took advantage of some very good prices (about €2.50 a kilo) to buy 5 heads of chicory to make a side dish to go with yesterday's roast chicken. This is roughly the recipe.

Braised chicory with Roquefort
Serves 4-6
5-6 heads of chicory
1 tbsp lemon juice
2 tbsp olive oil
20g butter
About 125ml chicken or vegetable stock
50g Roquefort or other blue cheese. Or almost any leftover cheese for that matter - Comté would be good.

Cut the heads of chicory in half lengthwise and remove any damaged outer leaves. Fill a large shallow pan with water, bring to the boil and add the lemon juice to stop the chicory discolouring. Add the chicory, reduce to a simmer and cook for 4-5 minutes then remove with a slotted spoon.

Discard the water from the pan, add the oil and then the butter. Once melted lay the halved chicory heads in the pan and fry until well browned, turning them carefully halfway through so as not to break them up. Lay them cut side upwards in a shallow baking dish, pour over the stock and crumble over the cheese. Cook alongside whatever roast you're cooking for another 10-15 minutes until the cheese is lightly browned and the stock pretty well evaporated.

I also made a dish of leeks vinaigrette for which I posted a recipe on the blog a couple of years ago. Good to be reminded how good it is though and leeks are very tasty at the moment.

viernes, 17 de mayo de 2013

Noble Pig, Kamloops

(december 2010)


deep fried pickles


tropical pizza


cubano sandwich

the noble pig
650 victoria st

website coming soon (?)